Mobile Hotspot Troubleshooting
Mobile Hotspot Troubleshooting with Computer Network resets
Enabling Mobile Hotspot iOS:
Note: Wi-Fi must be turned off to enable Personal Hotspot.
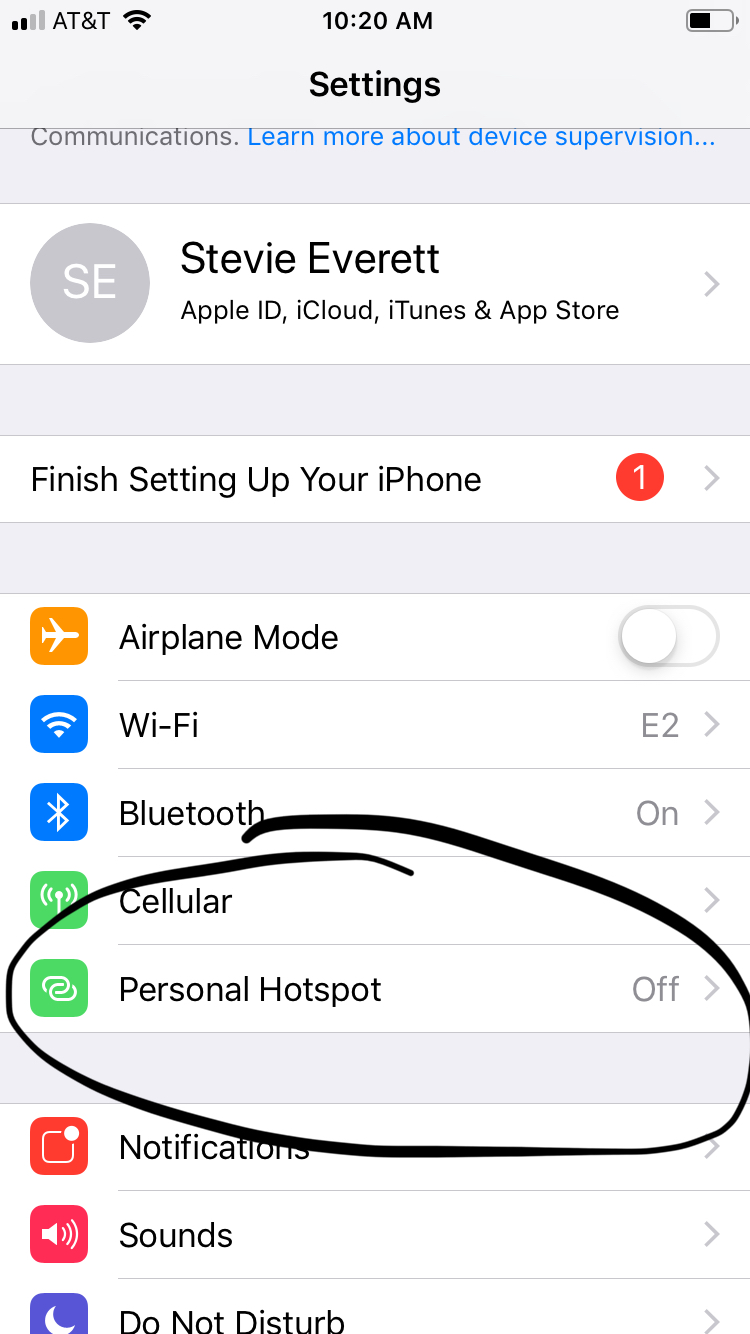
- Go to Settings
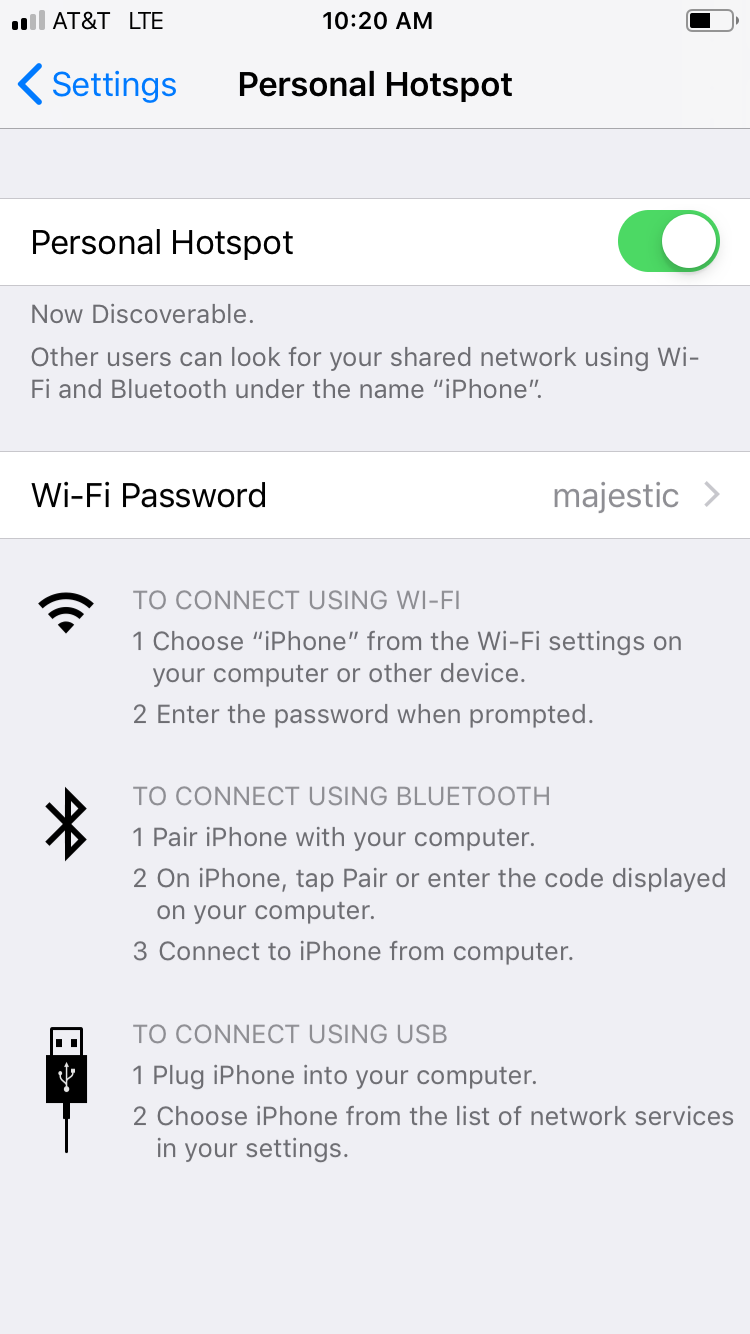
- Tap on Personal Hotspot.
- Select the Personal Hotspot switch to turn the mobile hotspot on.
Note: The Personal Hotspot network name is the same name as your iPhone.
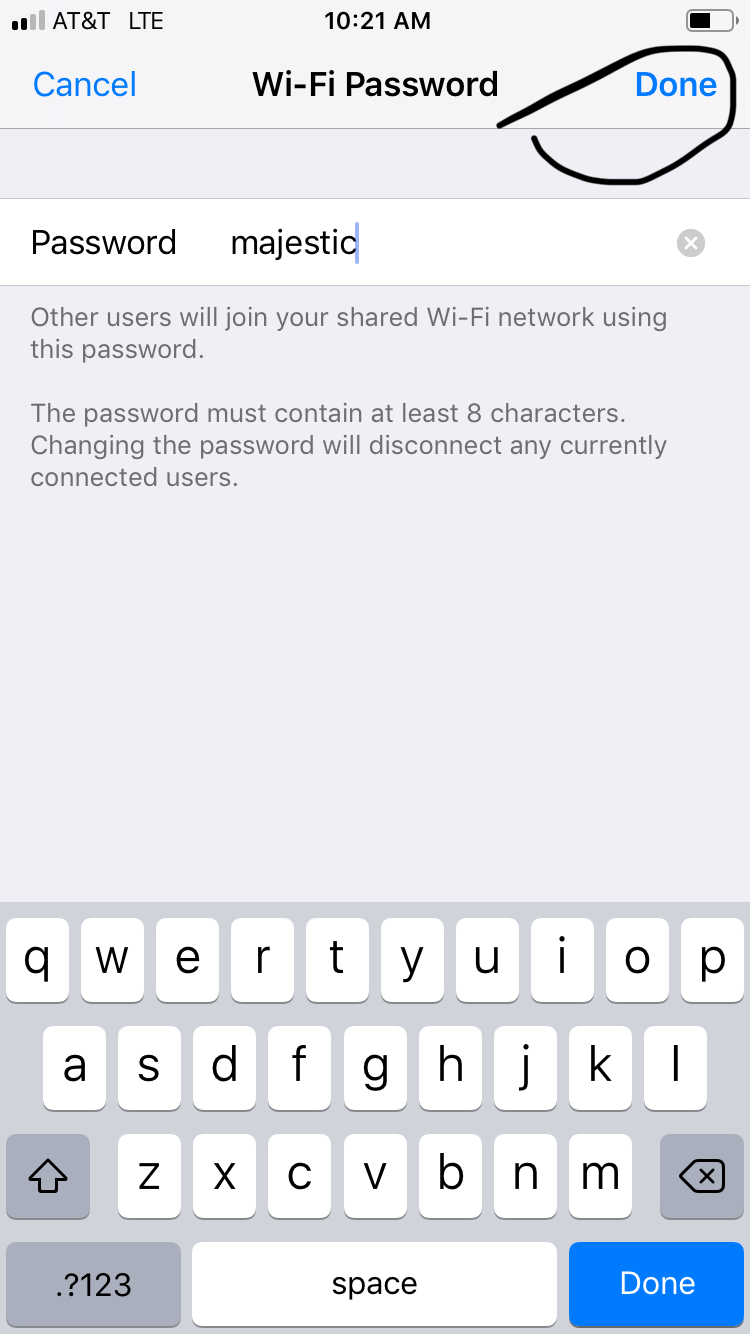
- To change the personal hotspot's password, select Wi-Fi Password.
- Change the password as desired, then select Done.
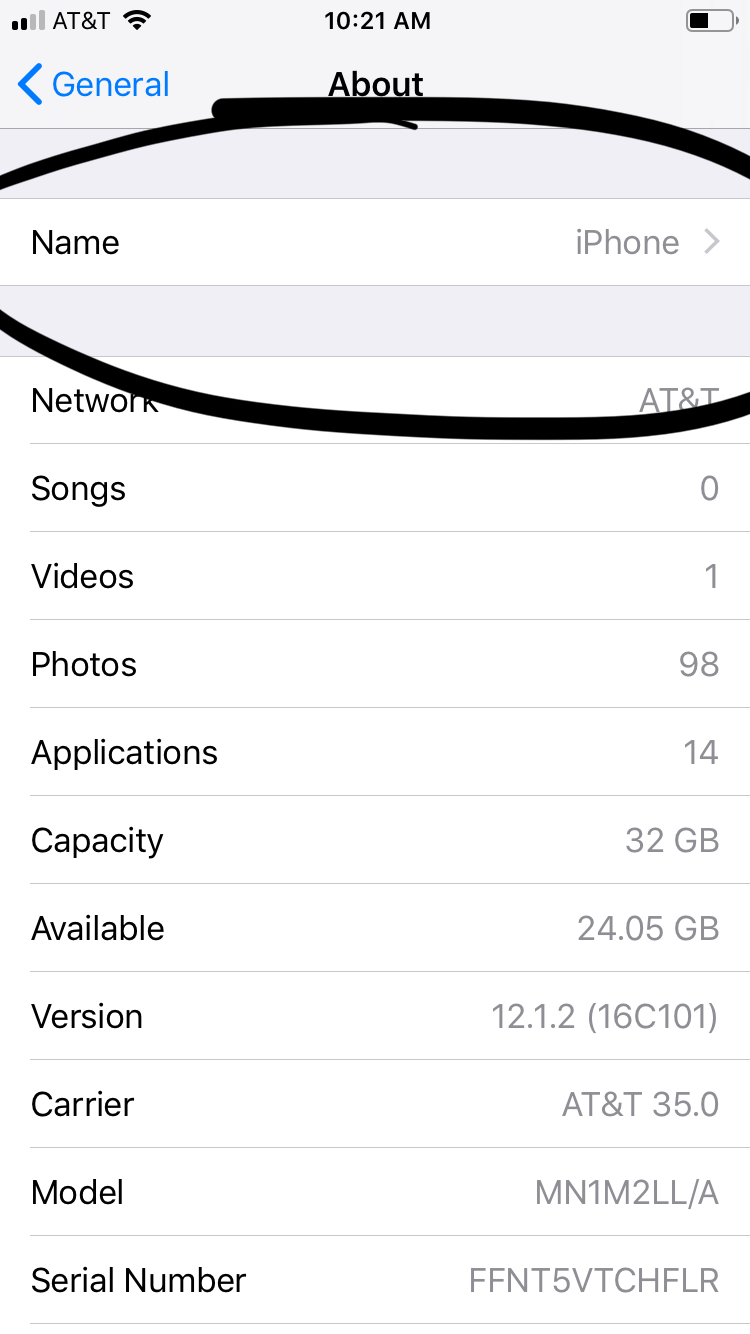
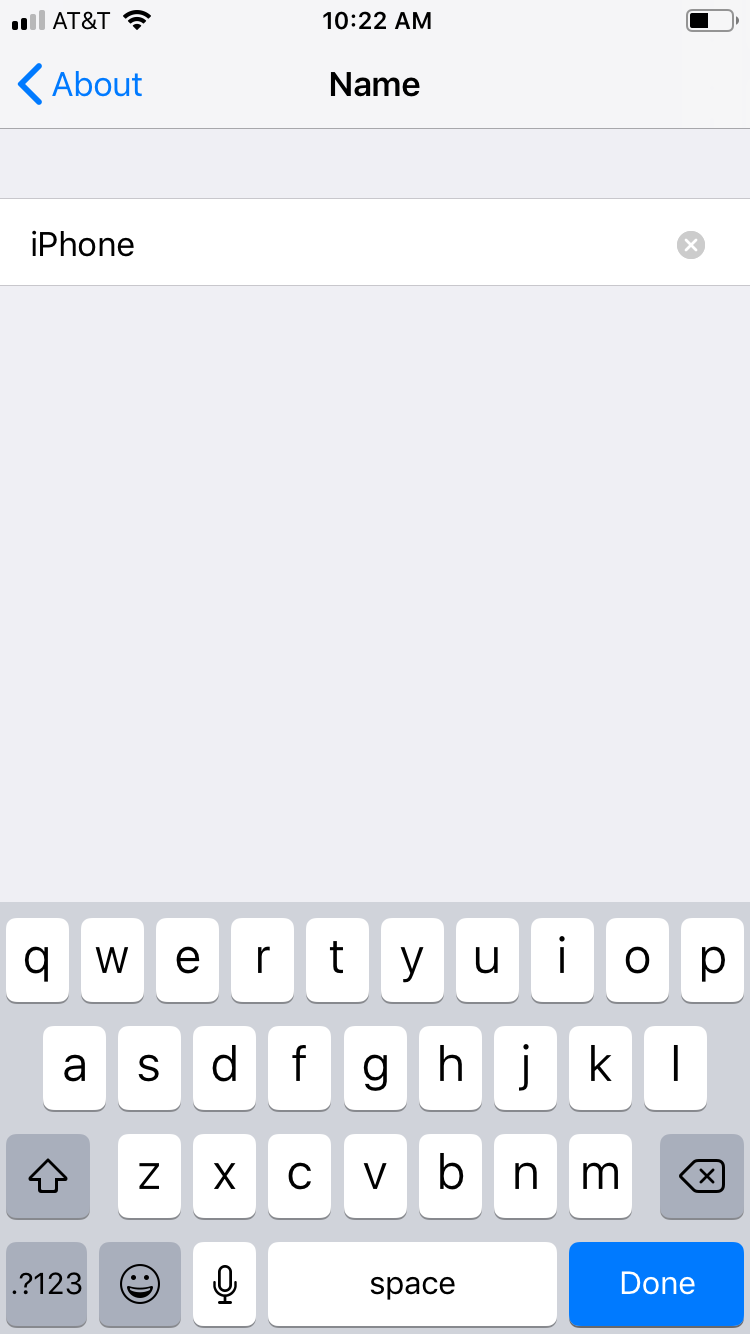
Note: To change the network name, from the home screen, select the Settings app > scroll to and select General > select About > Name. Rename your device using the on-screen keyboard, then select Done.
- When devices are connected to the Hotspot Wi-Fi network, Personal Hotspot and the number of devices connected will be displayed in the Status bar.
- From the Personal Hotspot screen, select the Personal Hotspot switch to turn the hotspot off.
Troubleshooting on iOS via Network Reset:
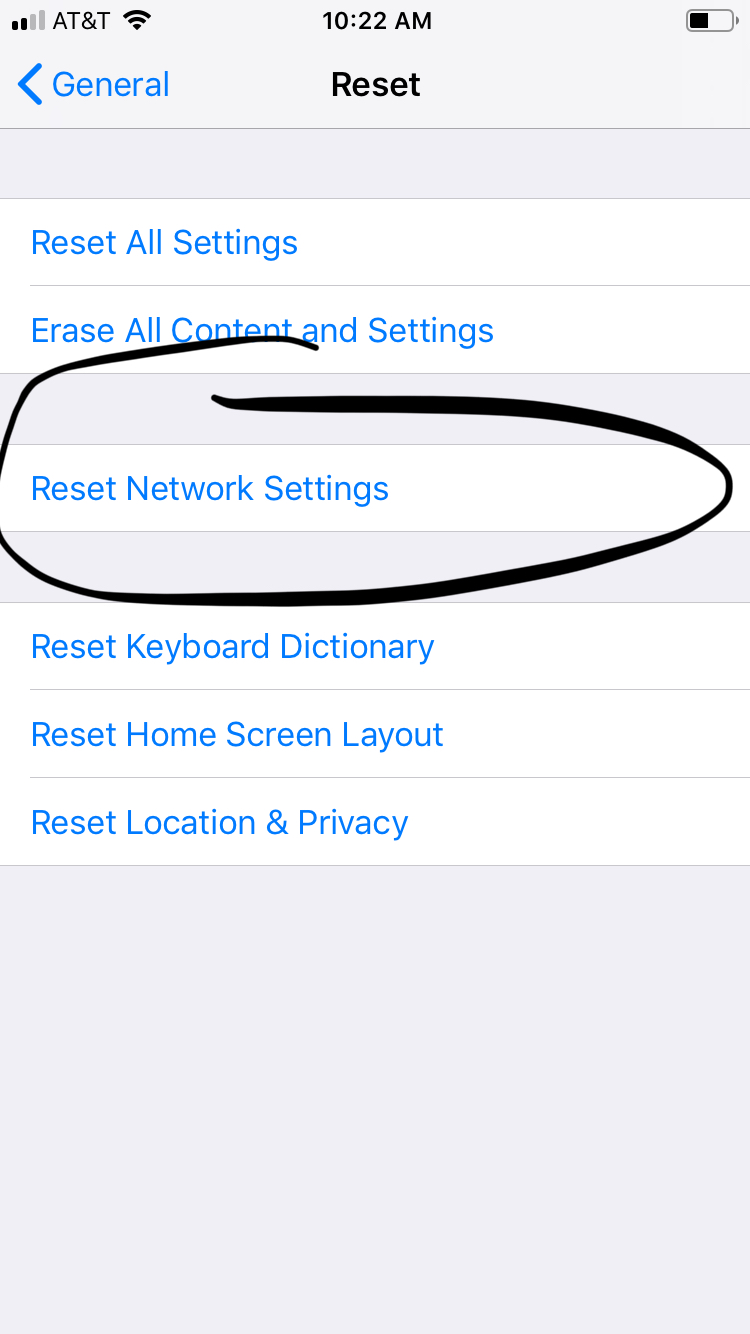
- Go to Settings.
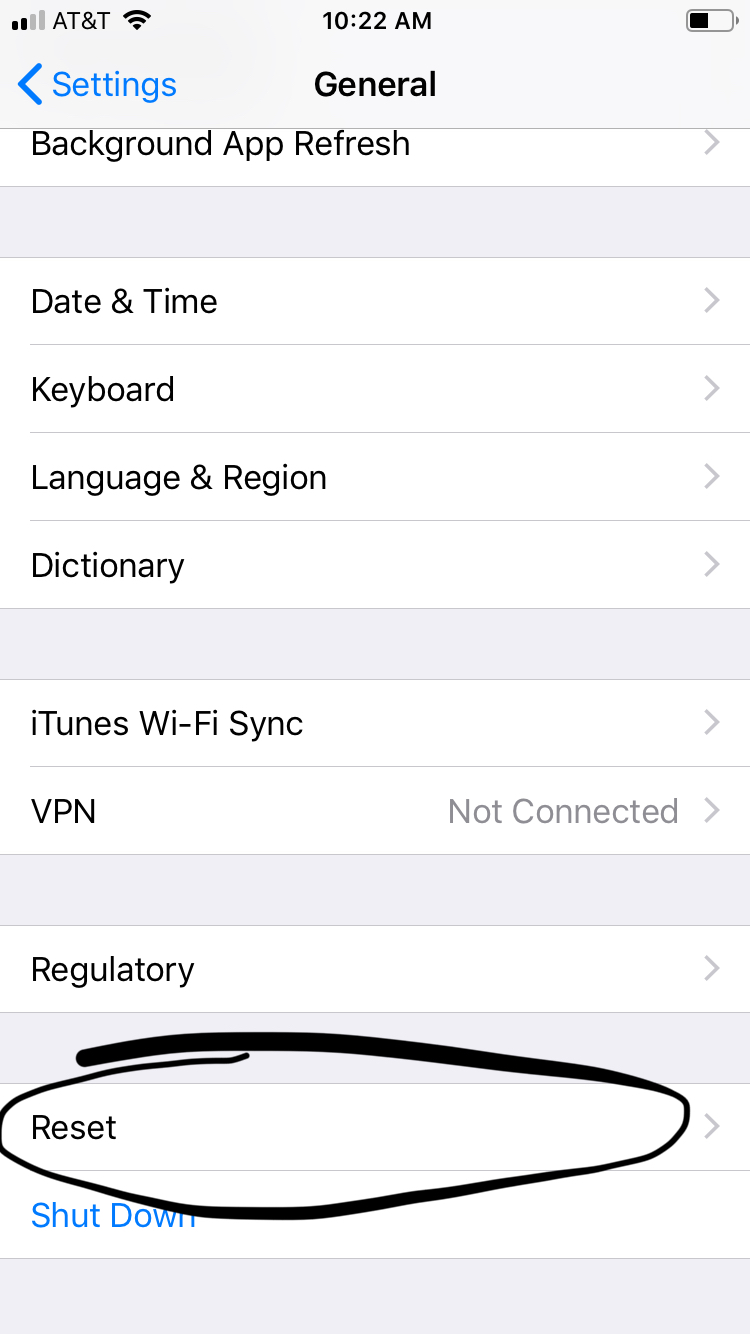
- Tap on General.
- Tap Reset.
- Tap Reset Network Settings, enter your passcode if prompted.
Note: You will then see the Apple logo and your phone will restart and try to reconnect to the network.
Enabling Mobile Hotspot Android:
- Turn off Wi-Fi.
- Open the Settings app.
- Tap on More in the Wireless & Networks section.
- Choose Tethering & Portable Hotspot.
Note: Tethering & Mobile Hotspot item might be found on the main settings app screen.
- You may see text describing the process. If so, dismiss the text.
- Touch the box to place a check mark by the Portable Wi-Fi Hotspot or Mobile Hotspot item.
- Choose the Set Up Wi-Fi Hotspot to configure the connection.
- Tap the Save or OK button to set your changes.
- When the mobile Hotspot is active, you will see the Hotspot Active notification icon.
Troubleshooting on Android via Network Reset:
- Open the Settings app.
- Tap General Management, Backup and Reset or More (depending on your Android).
- Tap Reset or Reset Network Settings.
- Tap Reset Settings.
Note: If prompted, enter your PIN, password or pattern.
- Tap Reset Settings one more time to confirm.
Forgetting Wi-Fi connection on PC:
*This may vary based off PC version and operating system
- Click the Start button on the bottom left.
- Select Control Panel.
- Select Network and Internet.
- Click Network and Sharing Center.
- In the task list, choose Manage wireless networks.
- In the Network table, select the existing profiles and click Remove.
- You may see a warning dialog box, click OK.
- Then go back to Network and Sharing Center and choose Change adapter settings -> right click Wireless Network Connection -> click Connect/Disconnect.
- Click the refresh button to view available wireless networks. Highlight the network which you want to connect, double click it or click Connect button.
Windows 10:
- Click the Wi-Fi button from the system tray (bottom right corner).
- In the list of available Wi-Fi networks, locate the network that you want to forget.
- Right on the network that you want to remove.
- From the menu choose the Forget option.
- That Wi-Fi network is removed from the list of known networks.
- Reattempt to reconnect to your desired network.
Forgetting Wi-Fi connection on Mac:
- Pull down the Wi-Fi menu icon and choose “Open Network Preferences” or go to the “Network” preference pane from Apple menu and System Preferences.
- Open Network Preferences in Mac OS X from the menu bar.
- Select “Wi-Fi” from the network panel sidebar, then click the “Advanced” button in the corner.
- Go to Advanced Wi-Fi Network Preferences in Mac OS X.
- Go to the “Wi-Fi” tab and find the router/network to forget under the “Preferred Networks” list.
- Select the network and then choose the [-] minus button to remove (forget) the wireless network.
- Remove a Wi-Fi Network.
- Confirm to forget the Wi-Fi network by choosing “Remove.”
- Click “OK”, then exit out of System Preferences, choose “Apply” if asked.
